入门(Rails 7)
注意
本教程适用于 Ruby on Rails 7。如果这不是您使用的版本,请从导航菜单中选择适合您 Rails 版本的相应教程。
新应用程序
本节演示如何使用Mongoid ODM创建新的Ruby on Rails应用程序。通过替换Rails默认的ActiveRecord适配器,我们将使用MongoDB的ORM-like库进行数据访问,创建一个类似于Ruby on Rails入门指南中描述的博客应用程序。
本应用程序的完整源代码可以在 mongoid-demo GitHub 仓库 中找到。
注意
本指南假设您对 Ruby on Rails 基础知识有所了解。若想了解更多关于 Ruby on Rails 的信息,请参阅其 入门指南 或其他 Rails 指南。
安装rails
我们将使用 Rails 生成器来创建应用程序框架。为此,第一步是安装 rails 珠宝。
gem install rails -v 7.1
创建新应用
使用 rails 命令创建应用骨架,如下所示
rails new blog --skip-active-record cd blog
我们传递 --skip-active-record 来请求不将 ActiveRecord 添加为依赖项,因为我们将使用 Mongoid。
可选:跳过测试
如果您打算使用 RSpec 对您的应用进行测试,可以通过传递 --skip-test 和 --skip-system-test 选项来指示生成器省略默认的 Rails 测试设置
rails new blog --skip-active-record --skip-test --skip-system-test cd blog
设置 Mongoid
1. 修改 Gemfile 以添加对 mongoid 钥匙的引用
gem 'mongoid'
安装钥匙依赖项
bundle install
生成默认的 Mongoid 配置
bin/rails g mongoid:config
此生成器将创建 config/mongoid.yml 配置文件(用于配置连接到 MongoDB 部署),以及 config/initializers/mongoid.rb 初始化器文件(可能用于其他 Mongoid 相关配置)。注意,由于我们不是使用 ActiveRecord,所以不会有 database.yml 文件。
为自管理 MongoDB 配置
上一步中创建的配置适用于本地运行 MongoDB 服务器的情况。如果您还没有本地 MongoDB 服务器,请 下载并安装 MongoDB。
尽管生成的 mongoid.yml 可以无需修改即可使用,但我们建议在开发中减少服务器选择超时。通过此更改,mongoid.yml 中取消注释的行应如下所示
development: clients: default: database: blog_development hosts: - localhost:27017 options: server_selection_timeout: 1
为MongoDB Atlas进行配置
与其下载、安装和本地运行MongoDB,您可以在MongoDB Atlas创建一个免费的账户,并在Atlas中创建一个免费的MongoDB集群。集群创建完成后,按照连接到集群页面中的说明获取URI。使用Ruby驱动程序2.5或更高版本格式。
将URI粘贴到config/mongoid.yml文件中,并取消注释已定义的主机。当使用Atlas时,我们建议将服务器选择超时设置为5秒用于开发环境。
config/mongoid.yml中取消注释的内容应如下所示
development: clients: default: uri: mongodb+srv://user:pass@yourcluster.mongodb.net/blog_development?retryWrites=true&w=majority options: server_selection_timeout: 5
运行应用程序
现在,您可以运行以下命令来启动应用程序服务器
bin/rails s
通过访问localhost:3000来访问应用程序。
添加帖子
使用标准的Rails脚手架,Mongoid可以为我们的博客生成必要的模型、控制器和视图文件,以便我们快速开始创建帖子。
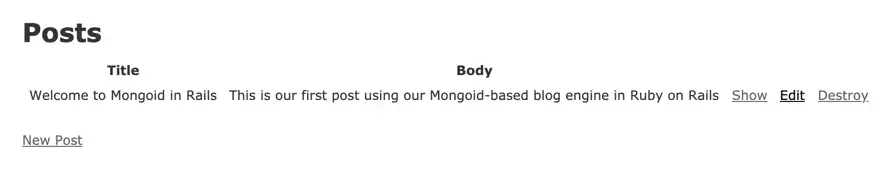
bin/rails g scaffold Post title:string body:text
导航到 localhost:3000/posts 以创建帖子并查看已创建的帖子。

添加评论
为了让我们的应用程序更具有交互性,让我们添加用户可以为我们的帖子添加评论的功能。
创建评论模型
bin/rails g scaffold Comment name:string message:string post:belongs_to
打开Post模型文件,app/models/post.rb,并为评论添加一个has_many关联。
class Post include Mongoid::Document include Mongoid::Timestamps field :title, type: String field :body, type: String has_many :comments, dependent: :destroy end
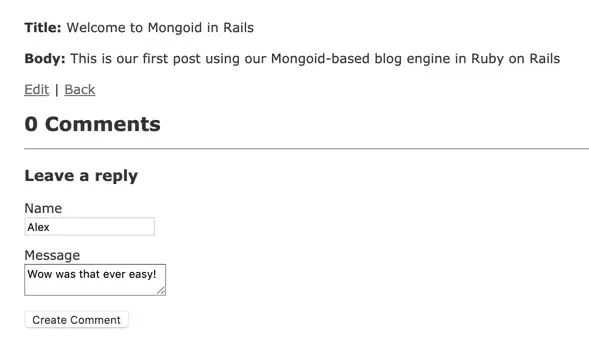
打开app/views/posts/show.html.erb,并添加一个渲染现有评论并提示留下新评论的段落。
<section class="section comments"> <div class="container"> <h2 class="subtitle is-5"> <strong><%= @post.comments.count %></strong> Comments </h2> <%= render @post.comments %> <div class="comment-form"> <hr /> <h3 class="subtitle is-3">Leave a reply</h3> <%= render partial: 'comments/form', locals: { comment: @post.comments.build } %> </div> </div> </section>
打开app/views/comments/_form.html.erb,将:message字段的类型从text_field更改为text_area,以及将:post_id字段的类型从text_field更改为hidden_field。结果应该如下所示
<%= form_with(model: comment, local: true) do |form| %> <% if comment.errors.any? %> <div id="error_explanation"> <h2><%= pluralize(comment.errors.count, "error") %> prohibited this comment from being saved:</h2> <ul> <% comment.errors.full_messages.each do |message| %> <li><%= message %></li> <% end %> </ul> </div> <% end %> <div class="field"> <%= form.label :name %> <%= form.text_field :name %> </div> <div class="field"> <%= form.label :message %> <%= form.text_area :message %> </div> <div class="field"> <%= form.hidden_field :post_id %> </div> <div class="actions"> <%= form.submit %> </div> <% end %>
接下来,用以下内容替换app/view/comments/_comment.html.erb
<p> <strong><%= comment.name %>:</strong> <%= comment.message %> <%= link_to 'Delete', [comment], data: { "turbo-method": :delete, "turbo-confirm": 'Are you sure?' } %> </p>
现在您应该能够为帖子留下评论了

现有应用程序
Mongoid可以轻松地添加到现有的Rails应用程序中,并与其他ActiveRecord适配器并行运行。如果这是您的用例,更新依赖项和配置文件将允许您在应用程序中使用MongoDB。
要将现有的Ruby on Rails应用程序切换到使用Mongoid而不是ActiveRecord,需要执行以下配置更改,具体如下。
依赖项
首先,需要在您的Gemfile中添加mongoid宝石。
gem 'mongoid'
如果Mongoid将是唯一的数据库适配器,则从Gemfile中删除或注释掉任何提到的RDBMS库,例如sqlite或pg。
安装钥匙依赖项
bundle install
Mongoid配置
生成默认的Mongoid配置
bin/rails g mongoid:config
此生成器将创建用于配置MongoDB部署的config/mongoid.yml配置文件和config/initializers/mongoid.rb初始化器文件(可能用于其他Mongoid相关配置)。通常,建议使用mongoid.yml进行所有Mongoid配置。
请查阅以下部分 为自托管 MongoDB 配置 和 为 MongoDB Atlas 配置,以确定您希望如何部署 MongoDB,并根据需要进行调整 Mongoid 配置(config/mongoid.yml)。
已加载的框架
检查 config/application.rb 文件。如果它是通过 require 'rails/all' 引入 Rails 的所有组件,请将其更改为引入单个框架。要验证 rails/all 的内容,请查看您版本的 Github 仓库
# Remove or comment out #require "rails/all" # Add the following instead of "rails/all": require "rails" # require "active_record/railtie" rescue LoadError # require "active_storage/engine" rescue LoadError require "action_controller/railtie" rescue LoadError require "action_view/railtie" rescue LoadError require "action_mailer/railtie" rescue LoadError require "active_job/railtie" rescue LoadError require "action_cable/engine" rescue LoadError # require "action_mailbox/engine" rescue LoadError # require "action_text/engine" rescue LoadError require "rails/test_unit/railtie" rescue LoadError
警告
由于它们依赖于ActiveRecord,ActionText、ActiveStorage和ActionMailbox不能与Mongoid一起使用。
ActiveRecord配置
审查所有配置文件(config/application.rb,config/environments/{development,production.test}.rb)并删除或注释掉对config.active_record和config.active_storage的任何引用。
调整模型
如果你的应用程序已经存在模型,则在从ActiveRecord迁移到Mongoid时需要更改这些模型。
ActiveRecord模型继承自ApplicationRecord并且没有列定义。Mongoid模型通常没有超类,但必须包含Mongoid::Document,并且通常显式定义字段(但动态字段也可以用来代替显式字段定义)。
例如,一个简单的Post模型在ActiveRecord中的样子可能如下所示
class Post < ApplicationRecord has_many :comments, dependent: :destroy end
同样的模型在Mongoid中的样子可能如下所示
class Post include Mongoid::Document field :title, type: String field :body, type: String has_many :comments, dependent: :destroy end
或者使用动态字段的样子
class Post include Mongoid::Document include Mongoid::Attributes::Dynamic has_many :comments, dependent: :destroy end
Mongoid不使用ActiveRecord迁移,因为MongoDB在存储数据之前不需要定义模式。
数据迁移
如果你已经在关系型数据库中有了想要转移到MongoDB的数据,你将需要执行数据迁移。如上所述,不需要模式迁移,因为MongoDB不需要预先定义的模式来存储数据。
迁移工具通常与要迁移的数据相关,因为尽管 Mongoid 支持比 ActiveRecord 更广泛的关联,但模型引用在集合中的存储方式在 Mongoid 和 ActiveRecord 之间不同。话虽如此,MongoDB 提供了一些资源,帮助从 RDBMS 迁移到 MongoDB,例如RDBMS 到 MongoDB 迁移指南和现代化指南。
Rails API
使用 Mongoid 创建 Rails API 应用程序的过程与创建常规应用程序相同,唯一的区别是 --api 参数要传递给 rails new。将 Rails API 应用程序迁移到 Mongoid 遵循上述常规 Rails 应用程序的相同过程。
一个与本文教程中描述类似的完整 Rails API 应用程序可以在mongoid-demo GitHub 仓库中找到。